Related Topics
The release of v6.1 introduced a completely new User Interface (UI) for Process Director. The new UI is discussed in detail at the Process Director Navigator User Interface topic. This new UI is the default user interface for process Director. While it is technically possible to retain the older interface, it does require a special configuration, and BP Logix recommends using the current UI.
While the overall UI has changed, the UI for individual Content List objects has remained largely unchanged, with various properties for the object accessible via a column of tabs on the left side of the page that enable access to different types of property. While every object has a set of unique property tabs, many objects also share some common tabs.
In this topic, we'll take a look at these common UI elements.
Folder Properties
Every folder in the Content List has folder definition properties that can be accessed by selecting Properties from the dropdown menu to display the folder definition.
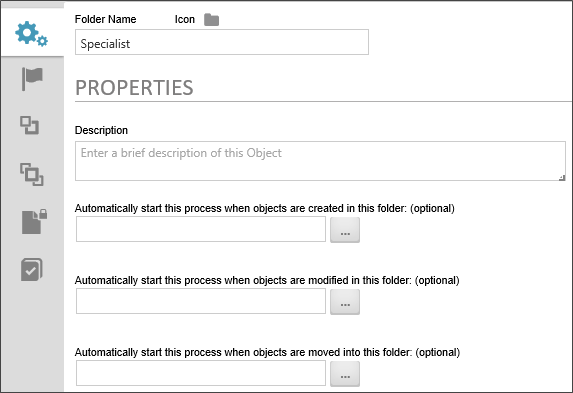
We'll discuss the various tabs that are arrayed on the left side of the object definition below, but, for now, in the Properties tab of a Folder definition, you can rename the folder by changing the Folder Name property. Similarly, you can change the default folder icon by clicking the folder icon displayed in the Icon property, and selecting a new Icon from the Icon Chooser.
There are three very important properties displayed at the bottom of the Properties tab:
- Automatically start this process when objects are created in this folder
- Automatically start this process when objects are modified in this folder
- Automatically start this process when objects are moved into this folder
Each of these properties enable you to specify a process that you want to start automatically when the listed events occur. For instance, you can start a process automatically when any document is imported into the folder. This would enable you to set up a scheduled file import into the Content List folder, and, each time a document imports, run a process on that document, which will automatically attach the imported document to the process.
For Process Director v6.1.0 and higher, the Automatically start... properties enable you to chose a Stream Actions object to invoke. Prior versions only enabled you to choose only a process definition, e.g., a Process Timeline object.
Standard Icons #
At the top right corner of the Content List, a series of standard icons and a Create New menu appears.
![]()
From left to write, the standard icons you see will be:
- Refresh: This icon will refresh the current screen when clicked.
- Navigate to Parent: For Process Director v6.1.0 and higher, this icon appears inside folders that are located below the root level of the Partition. Clicking this icon will automatically navigate you to the parent folder of your current location.
- Properties: This icon will, when clicked, open the Properties screen of the current Content List folder.
The Create New menu is used to create new Process Director objects inside the current folder. For more information on the operation of this menu, please refer to the topic for Creating Content List Objects.
Action Buttons #
Objects in the Content List can be selected by checking the box that appears at the left side of each row in the Content List. When you click the check box, to select an item, several Action Buttons will be displayed, to enable you to move, copy, export, etc., the selected item.

Object Definition Interface #
The definition for each Process Director definition object is presented in a tabbed interface.
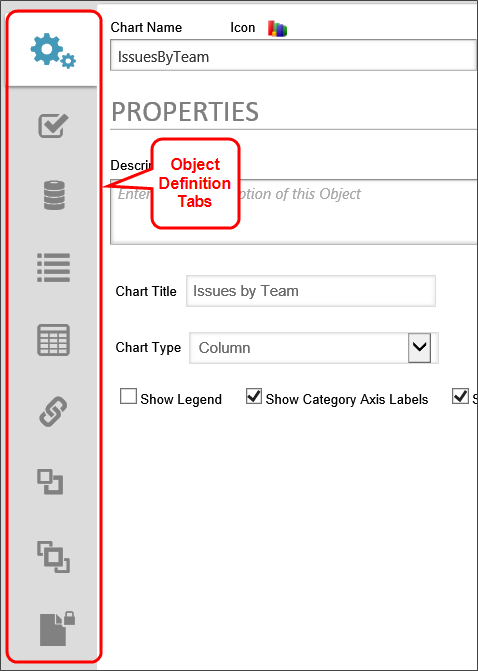
Each object has a set of tabs that are specific to the object type of the definition. Additionally, each process Director Object has a set of common tabs that are the same for every object.
Properties Tab #
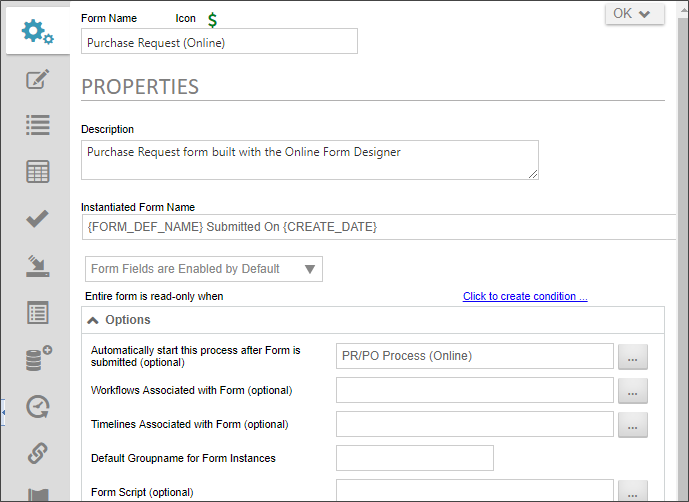
Every Process Director object has a Properties tab, and the contents of this tab will vary widely. For instance, the Properties tab for a definition object usually contains the basic configuration properties for the object, while the Properties tab of an object instance will display, but not generally allow you to configure, some properties of that instance. Let's take the Form object as an example. The Form definition's Properties tab provides several configuration settings that you can edit.
On the other hand, the Form instance's Properties tab displays the field contents of that form instance, and, for Process Director v5.1 and higher, enables you to refresh the data, or to export the data to a CSV file by using the icons that appear in the upper right corner of the information grid.
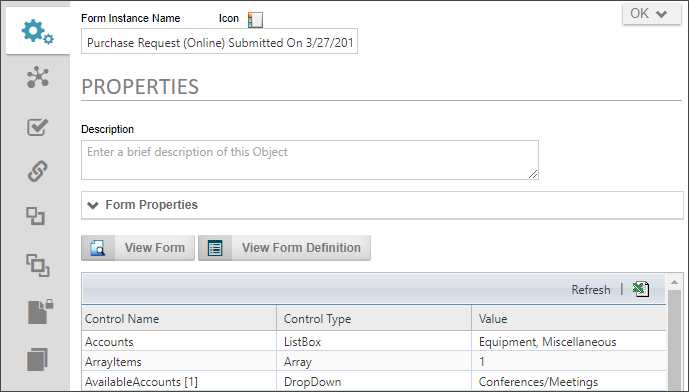
Again, the types of information you'll see on the Properties tab is widely divergent, so the detailed explanation for configuring the Properties tab will be given in the documentation for each individual object.
Object Links Tab #
The Object Links tab shows all Process Director objects which have a link to the object definition, or to which the definition has a link.

Examples of linked objects would include:
- The Process Timeline.
- Forms that use the Business Value.
- Dashboards, Goals and Business Values linked to the definition.
- System Variable references to the object
Check boxes enable you to show System Variable or Custom Task references to the object, if desired:
- Search for System Variable strings referencing something in this definition
- Search Custom Task configurations that may be referencing something in this definition (This may require searching for SysVar strings also)
It is important to remember that these two check boxes are interdependent. For example, clicking on the System Variable strings... check box won't return system variable strings used in a Custom Task unless the Custom Task configurations... check box is also checked. Similarly, checking the Custom Task configurations... check box won't return results for references by System Variable in a Custom Task unless the System Variable strings... check box is also checked.
For Process Director v6.`1.350 and higher, a CSV icon will, when clicked, export the contents of the tab to a CSV file.
Meta Data Tab #

Meta Data categories and attributes can be assigned to each Definition.
When you click the Assign Meta Data button, it opens a dialog box from which you can choose the Meta Data categories you wish to assign.
When you click the Add Meta Data to All Child Items button, all of the Meta Data assigned to the definition will be copied to all of the instances in addition to any Meta Data that is already assigned to the instances.
When you click the Replace Meta Data for All Child Items button, all of the Meta Data assigned to the definition will be copied to all of the instances and replace any Meta Data that is already assigned to the instances.
For more information about Meta Data and its configuration, please refer to the Meta Data section of this guide.
Versions Tab #
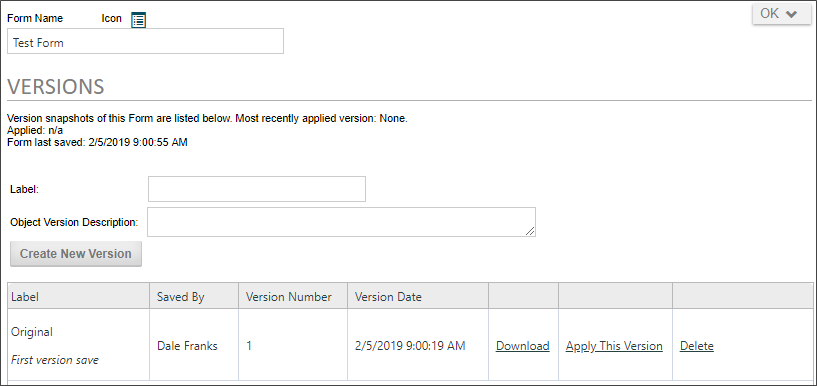
Process Director implements versioning for all objects, and each version consists of a complete snapshot of the object. Each version can be downloaded, deleted, or applied to the object to replace the current version.
To create a new version of the object, first fill out the version properties. The Label is the name you wish to give the version, and the Description is a brief explanation about the version that can provide additional information. Once you've finished setting the properties, click the Create New Version button to create the version.
Each version will display in a table that specifies the Label, the person who created the version, the version number, and the version creation date. Additional columns provide links to download an XML export of the version, to replace the current version with the selected version, or to delete the version.
 While any object can be versioned, BP Logix recommends creating versions at the application folder level to create a snapshot of the entire application, rather than versioning each object individually. Please refer to the topic on importing and exporting content for recommendations on how to organize your Content List into application folders.
The name of the version object.
A description of the versions purpose, changes made from previous versions, or other relevant information.
Once you've filled out the properties, click the Create New Version button. Process Director will record a snapshot of the version, and a new version row will appear at the bottom of the screen.
Links on each version row give you the option to apply the version as the current version in use, or delete it. If you choose to apply a version, Process Director will display a status screen to notify you of the success or failure of the attempt to apply it.
From the list of versions, you may
- Download an exported XML file containing the object by clicking the Download link.
- Revert to a desired version of the object by clicking the Apply this Version link for the version to which you wish to revert.
- Delete version by clicking the Delete link.
When a folder is selected for versioning, the version will contain all of the Content List objects contained in the folder. Reverting a folder to a previous version, therefore, will revert all of the objects in the Content List to the reverted version.
Just as definition objects have a version, Form instances also have a versioning scheme that is automatically applied by Process Director. When a Form instance is opened for the first time by a user, the Version number is "0". Each time the Form instance is edited and saved, the version number increases by an increment of 1. Unlike definition objects, however, Form instances can also have negative version numbers.
A negative version number for e Form instance has a special meaning. It means that the Form instance has been created but not submitted. For example, a, Form with a version number of -1 is a form attached to a Timeline instance but which has never been viewed by a user. A version number of -2 means that the user opened a new form and did a "save for later", which did not submit the Form, even though the data was saved.
By default, Forms with a negative version number won't be displayed in a Knowledge View because they aren't yet submitted forms, but are only partially complete. The negative version number also tells the Process Director that any configured form field "default values" still apply to the Form. Thus, when a user does open a form with a version number of -1, the default form field values will be applied. You can increment the version from a negative to a positive value, for example, by using custom scripting, but this will prevent default values from being applied.
Permissions Tab #
Process Director implements fine-grained permissions for all objects. Though we recommend that permissions be set at the folder level, each Process Director object may have unique permissions set on the object, using this tab.
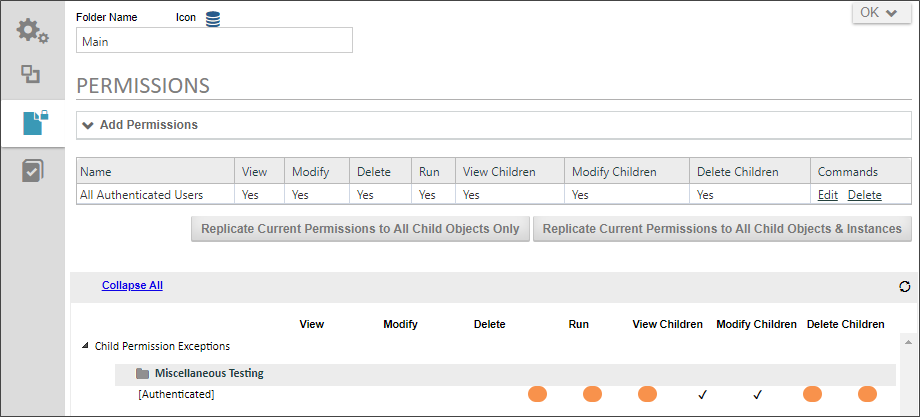
For Process Director v5.1 and higher, a Permissions Exceptions section will appear at the bottom of the page that shows all child objects whose permissions don't match that of their immediate parent. However, if a folder's permissions match its parent but it has children that don't match its own permissions, then that folder will be shown in order to show the children whose permissions don't match their parent.
For detailed information on how to set permissions, please see the Permissions topic.
References Tab #
Several Process Director object definitions include a References tab that displays a list of all objects or system variables that the object references. The purpose of the References tab is to attach a reference object, such as a file or document, to an object definition that will, when an instance is created, attach the reference object to the instance. For example, perhaps there is a document you'd like to upload, or a Content List document that you'd like to add, as a reference to the object definition. On the references tab, there is a Create New... actions menu in the upper right corner of the screen that enables you to choose:
If you choose this option, the upload dialog box will appear to enable you to upload a document or file as a reference to the definition object.
If you choose this option, an Object Picker will appear to enable you to select an item from the Content List.
Selected reference items will appear in the list on the References tab.

You can select the check box next to each reference item to view its properties, delete it, or set a Group Name for the object.
Once an instance of the definition object is created, the reference objects will automatically be attached to the instance. You can view the attachments in the Instance properties of the object in the Content List. For forms, you can view the attached reference objects via a ShowAttach control on the form. For example, when a new form instance is created using the reference objects above, you can view the attached reference objects on the form instance.

Import History Tab #
Process Director v4.55 and higher maintains a log of all import events, Active Directory Synchronizations, and Evaluations. These logs are displayed for each object in the object definition's Import History tab.
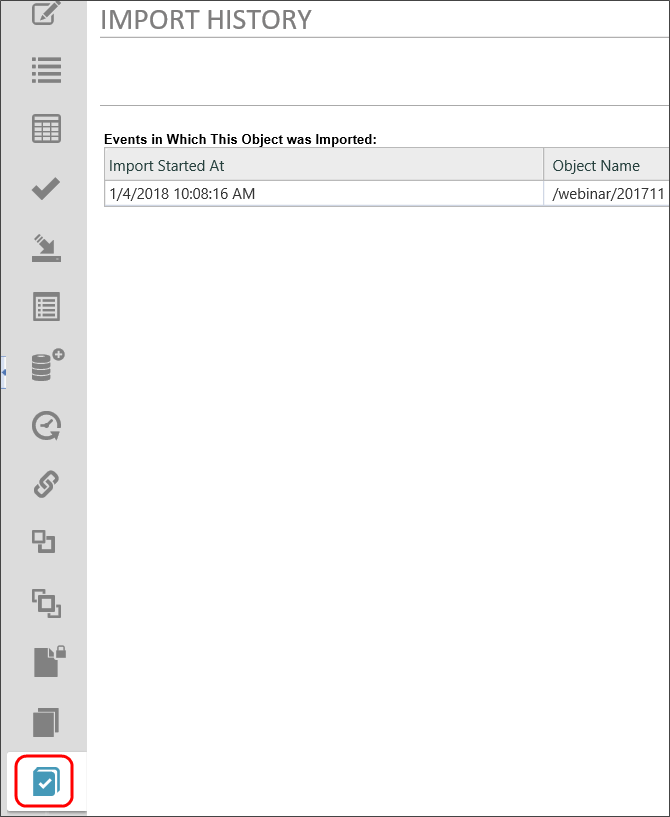
This import history can be disabled using the fEnableDatabaseLogs custom variable. By default, the logs are maintained for 30 days, but you can change the number of days to maintain the logs in the database by using the nImportLogDays custom variable.
Milestones Tab #
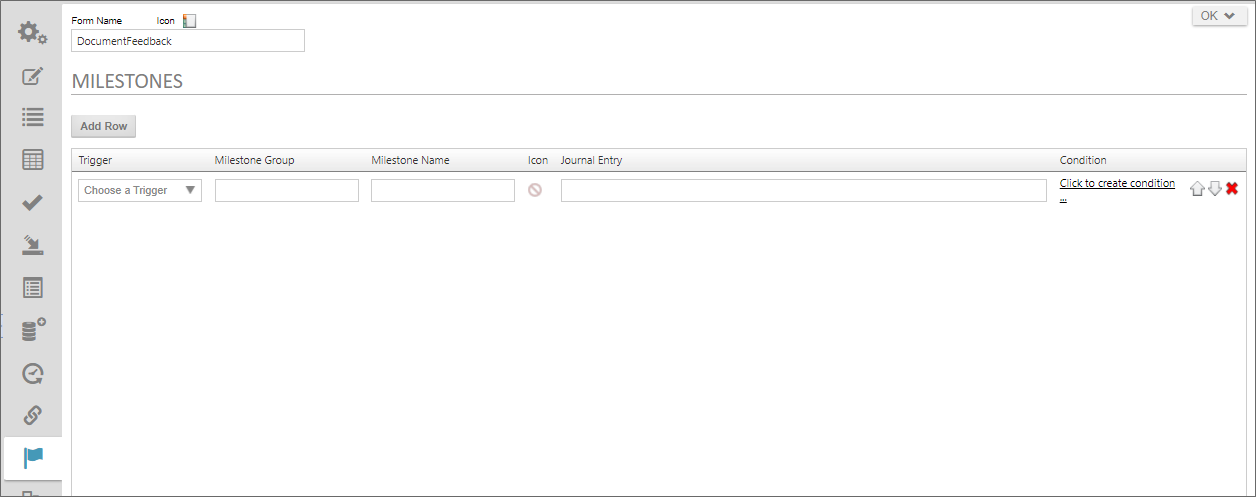
Users of Process Director v4.6 and higher have a Milestones tab available in event-driven objects such as Forms or Process Timeline definitions. Milestones are also accessible via the Milestone System Variables.
When creating a process application in Process Director, there are a number of Process Timeline and form events you can use to drive some decisions. But application events, while helpful, often don't provide the business-level, broad semantic context that is sometimes needed. Broad semantic context is where Milestones live. For instance you might want business-level events that provide information to drives business decisions such as:
- “Application for admission complete”
- “Additional information needed to pursue claim”
Process application events generally occur sequentially, but Milestone achievement may rely on disparate, asynchronous events and decisions. Similarly, while the events at the application level are very good at letting you know where you are in a specific process, they don't provide high-level, business-related information. That high-level information is often necessary to drive lower level transactional and semantic decisions, e.g.:
- “Begin review when application for submission complete”
- “Notify insured when certain documents remain outstanding”
Process Director enables you to generate business events from the lower-level transactional data, then combine business events to produce Milestones. You can use both events and milestones to drive application behavior and collaboration.
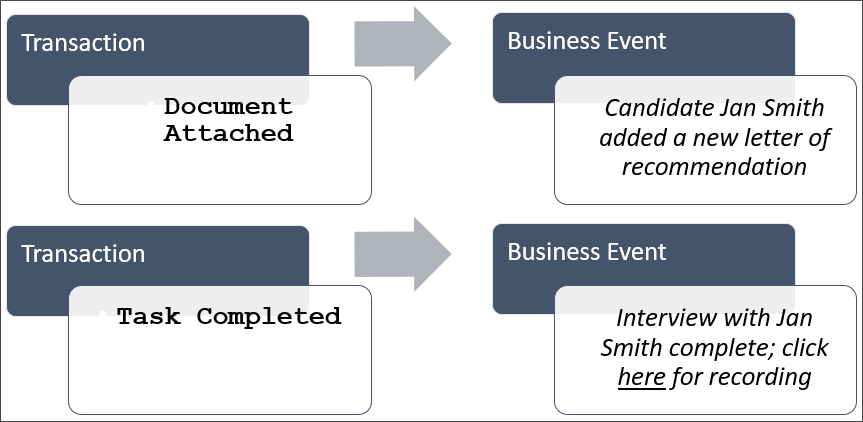
Milestone logging enables you to create special logs for business events and display those logs on a Form, using the Journal control.
You can add as many Milestones as you desire by clicking the Add Row button at the top of the tab.
For every event that you'd like to log, you have the following options.
The following triggers are generally available, though they don't include the Timeline Activity events, such as Activity Started, etc.:
| EVENT | DESCRIPTION |
|---|---|
| Process Started | Invoked whenever a Process Timeline is started. |
| Activity Started | Invoked whenever a Timeline Activity is started. |
| Activity Completed | Invoked whenever a Timeline Activity is completed. |
| User Task Complete | Invoked whenever a user completes an assigned task. |
| Document Added to Process | Invoked whenever a new document is attached to a process. |
| Document Updated in Process | Invoked whenever an existing document attachment is edited. |
| Form Added to Process | Invoked whenever a new Form is added to a process. |
| Condition Met | Invoked any time that a condition is met while milestone processing is occurring. |
The Milestone Group is a text value that is used to organize the activities. When you assign a log event to Display in the Activity Log control, all of the available log items will be grouped into the groups you create with this setting. So, you may have a "Documents" group, into which you might place all of the events that are invoked when document attachments are added or edited during the process. In the Object Picker that you use to display events in the Journal, all of those events will be organized into a Treeview Node, with the Group Names you create at the highest level of the Treeview.

The text name you wish to use for the Milestone.
You can choose an icon for the event from the icon chooser.
 Milestones can't use the older, raster-based icons displayed in the Older Built-in Icons or Custom Icons tabs of the Icon Chooser.
This is the logging message you wish to appear in the Journal control.
You can use the Condition Builder to create a condition set that must apply before the event is logged. Only events that match the condition will be logged.
Audit Viewer Tab #

Audit logs for Form and Case instances can be viewed on the Audit Viewer tab for the instance. Fields changes and other audit information will be displayed on this tab for instances that have the Audit Field Changes property checked in the object definition's properties.
The view can be refreshed by clicking the Refresh link, or exported to a CSV file by clicking on the Excel document icon, both of which are in the upper right corner of the information grid.
Object Control Menu #
Overall control of saving or running an object definition is embedded in the dropdown menu at the upper right of the definition. While not every object has all of the menu options described below, in general, object definitions give you the following control options.
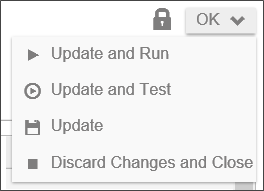
Clicking the Lock icon will lock the definition for editing and prevent other users from editing the definition. Locked definitions are identified by the Release Lock icon ( ) replacing the Lock icon.
The OK button will save and close the definition automatically. When you put your mouse over the OK button, additional menu option will open that you can select.
- The Update and Run menu item will save the object definition and open a new instance of the object.
- The Update and Test menu item will save and Form definition and open test version of the Form. The Test version shows you the look and feel of the Form, but won't instantiate a process. Instead, the Form will, when submitted, show a list of the values that would be saved with a live Form instance.
- The Update menu item will save the definition in its current state.
- The Discard and Change menu item will close the definition without saving any changes you may have made.
User Profile #
For Process Director v6.0.300 and higher, a user Icon in the upper right corner of the screen enables access to the User Profile page. Clicking this icon opens the User menu.
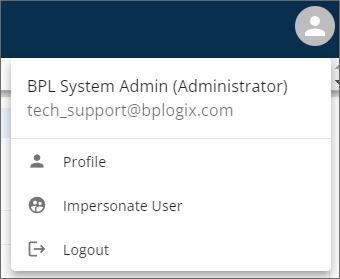
From the User menu, you can select Profile to display the User Profile page. Please see the
For users of earlier version of Process Director, the User Profile Slideout is a control that appears when you click the upper left corner of the Process Director screen. For users of Process Director 5.23 and higher, the Desktop interface for Workspaces presents the User Profile differently. Please refer to the Desktop Workspace topic for more information.
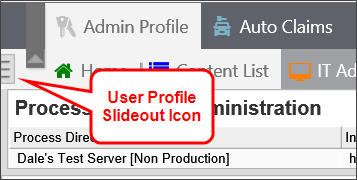
Clicking the Icon opens the Slideout to display the basic user information.
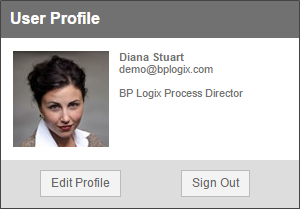
You can access and edit the User Profile page by clicking the Edit Profile button to open the user's profile page.
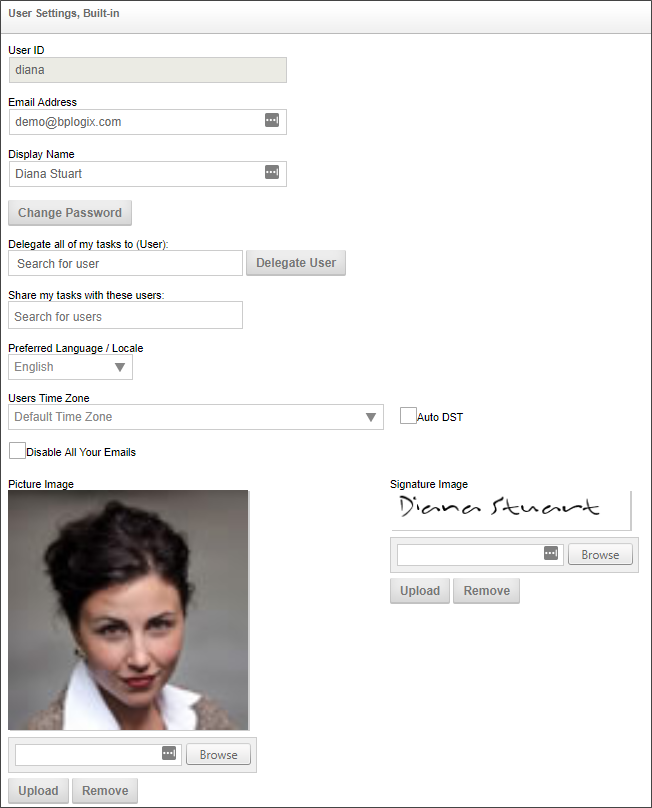
User Profile Page
From the user profile page, the user can edit their time zone/localization settings, perform delegation (if allowed by the System Administrator), and add personal/signature images to their profile.
Documentation Feedback and Questions
If you notice some way that this document can be improved, we're happy to hear your suggestions. Similarly, if you can't find an answer you're looking for, ask it via feedback. Simply click on the button below to provide us with your feedback or ask a question. Please remember, though, that not every issue can be addressed through documentation. So, if you have a specific technical issue with Process Director, please open a support ticket.

