Related Topics
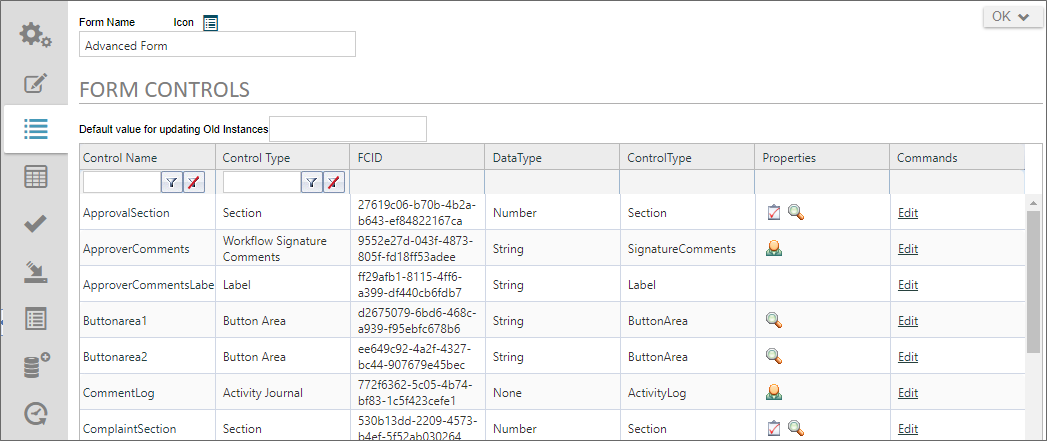
This tab displays a list of all the controls (i.e. form fields) on the Form definition. When you add a control the the Form Template, the corresponding Form data field will automatically be created, and the control will appear in the list of controls on the Form Controls tab after the Form Template is checked in.
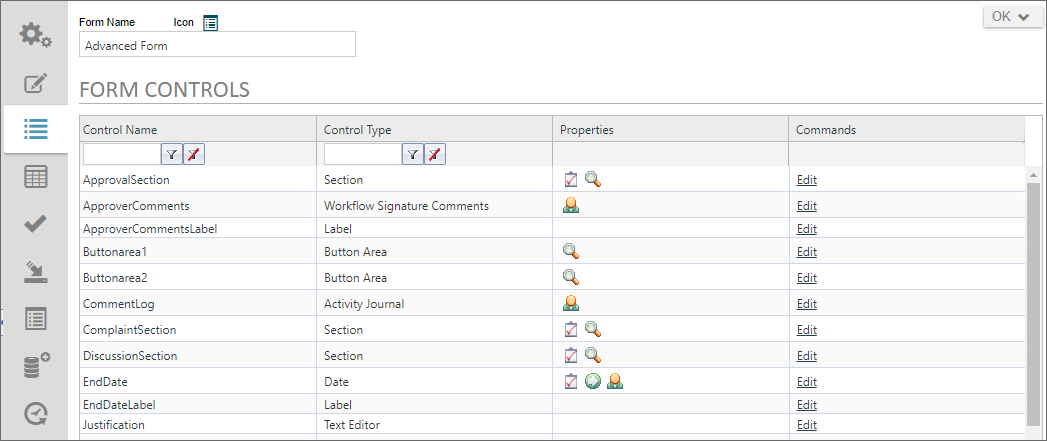
Properties can be configured for these form controls (fields) by clicking on the Edit link, which will open the Form Field Properties dialog box for the field.
Form Field Properties #
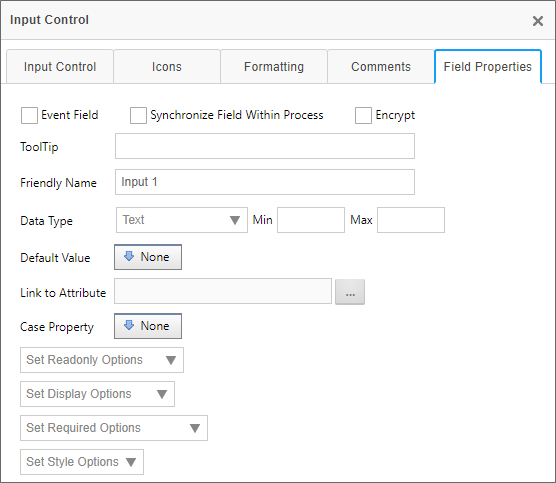
For Process Director v6.0 and higher, the Form field properties can also be configured in the Design Console, a persistent Properties pane that appears on the Edit tab, when the Online Form Designer is displayed. The Field properties can thus be configured on both the Edit tab, as well as the Form Controls tab of the Form definition. In the Online Form Designer, the Form field properties will appear on the Field Properties tab of the designer's persistent Properties pane, as shown below. This feature enables you to set the properties without having to navigate to the Form Controls tab, simplifying the process of fully configuring a control's properties. This feature doesn't necessarily replace the properties accessible from the Form Controls tab, but does give you an additional method for accessing the same properties from within the Form designer.
For all versions of Process Director prior to v6.0, Form field properties must be configured on the Form Controls tab of the Form definition.
On the Form Controls tab, the Form Field Properties dialog box for each form control can be opened by clicking the Edit link for each control. The dialog box enables you to configure the properties of each form field. You can configure the form field’s tooltip, its friendly name, the minimum and maximum values it can hold, as well as under what conditions the form field will be enabled, viewable, or required. You can also configure the form field’s default value, data type, and attribute to which it links. Different form field types may have some subset of the properties below, as not all field types have the full set of properties. In general, however, the full set of form field properties are listed below.
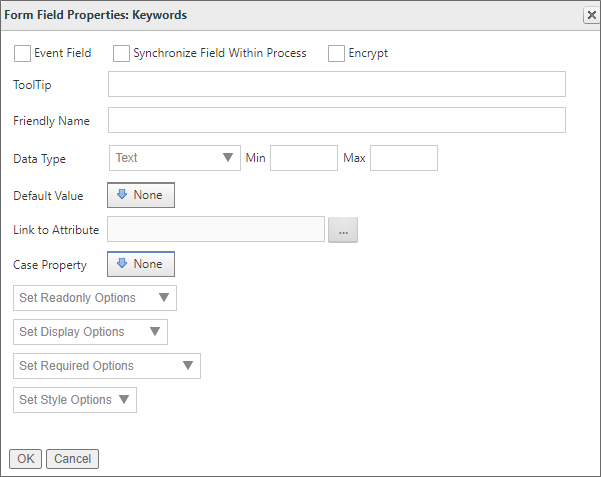
The form field properties include:
If checked, this form field will trigger an event when the value of the field changes. Events can be used to update the form by triggering Custom Tasks or custom form scripts.
If checked, this field will synchronize values will all other form fields that have the same name, but are on different form instances in the same Process. For instance, if you have a Form field named "FirstName" that you set as a synchronized field, any other form instance in the process that has a "FirstName" field will automatically be updated with the value you enter into the source form.
 A field should only be marked as synchronized on a single source Form. Do not attempt to mark the same field on two different Forms as synchronized. Doing so will result in unexpected behaviors.
If a column in an array is marked as synchronized, the number of rows and the content of that column will be synced with all other arrays in the process containing a column of the same name. This means that adding and removing rows in an array with a synced column will also add and remove rows in other arrays in the process with columns of the same name. Because synchronized array fields are so powerful, caution is recommended when using synchronized fields with arrays. Instead, we recommend alternatives, like the Copy Form Data Custom Task.
Prior to Process Director v4.04, field synchronization would only occur on form submission, but not when the Form was saved via a Save button, and not submitted. From v4.04, synchronization will occur any time the Form is saved, even if the Form isn't submitted.
If checked, the value of the Form field will be stored in an encrypted format that consists of a long string of letters and numbers generated through an encryption algorithm. For instance, if a field contains the value "cat", it might be stored in the Process Director database as:
~BXZf07ESalia7ugE3jkCyKelhidmimeL09Dpex1403sTmI=
When a Field is encrypted, displaying the Form instance will show the unencrypted value, so, in the example above, the Form field will display "cat" as its value when the Form is viewed. On the other hand, encryption will affect your ability to search on the value "cat" in a Knowledge View. Because Knowledge Views search at the database level, and the field value is stored in an encrypted format, a Knowledge View filter that looks for the value "cat" in an encrypted Form field will not return the correct result, because the encrypted value will neither contain nor equal the filter term "cat". So, setting a Form field value as encrypted will largely eliminate your ability to return the desired value when using the encrypted field in a Knowledge View filter.
When moused over, the form field will display the text entered into this text box as a tooltip.
Because Form Field Names have some unavoidable constraints in how they are named, the field names may not be particularly friendly for users. The Friendly Name property enables you to configure a different name that will be displayed to end users in places like Knowledge Views, without worrying about the constraints that you have to adhere to when you place a field on the form template. For users of Process Director v5.12 or higher, using a Camel Case value (e.g., MyField) for the field's Name will automatically create a Friendly Name based on the Camel Case Name (e.g., My Field).
This enables you to fill a Dropdown field with the content from a Dropdown Object. You can link multiple dropdowns to Dropdown Objects, which allows you to reuse Dropdown Objects in multiple forms.
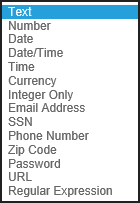
Setting the data type will enforce that the form field accepts data formatted as the appropriate type. The Data Type can be any of the following:
- Text: this option allows for arbitrary text to be entered into the form field
- Examples: “foo”, “bar”
- Number: this option ensures that the form field contains a number (either with or without a decimal)
- Examples: “10”, “9.75”
- Date: this option ensures that the field contains a date. Dates must be in a format that can be interpreted by .NET.
- Date/Time: this option ensures that the field contains a date and time. DateTimes must be in a format that can be interpreted by .NET.
- Time: this option ensures that the field contains a time, which can be in any of the following formats. Times must be in a format that can be interpreted by .NET.
- Currency: this option ensures that the contents of the field can be interpreted as an amount of currency
- Examples: “22”, “22.32”
- Integer Only: this option ensures that the field contains an integer. It also allows you to specify a minimum and maximum value that the integer can be.
- Examples: “1”, “394221”
- Email Address: this option ensures that the field contains an email address. As a user warning, email addresses shouldn't have any trailing spaces, or they'll be rejected as invalid. Process Director can only validate the format of an email address, meaning that it will ensure the email address has a format that includes an "@" and "." characters in approximately the correct locations in a text string, e.g.,
text@text.text. Process Director cannot otherwise determine the validity of an email address. - SSN: This option ensures that the field contains an American Social Security Number, with or without dashes.
- Examples: “123456789”, “123-45-6789”
- Phone Number: This option ensures that the field contains a phone number. Most formats people usually use to type phone numbers will be accepted, as this data type will ignore most special characters, but match on specific digits and patterns.
- Examples: “(123) 456-7890”, “+1 123-456-7890”, “123-4FO-OBAR x 4321”
- ZIP Code: This option ensures that the field contains an American ZIP Code. The ZIP code can contain only five digits or all nine digits.
- Examples: “12345”, “12345-6789”, “123456789”
- Regular Expression: This option enables you to set a format for data entry for the field, e.g., a Canadian Postal Code format like "M5W 1E6".
- Concealed Text: Introduced in Process Director v5.12, this field type replaces the "Password" data type, and will hide the text in the field. Additionally, the behavior of the "Password" data type was changed to check the password strength according to the system settings and return an error if the password strength of the entered value isn't strong enough. This change will automatically convert all form fields that were previously configured as a Password data type to Concealed Text. Fields set to this type will display values with a set number of asterisks (****) when displayed in a Knowledge View, in a disabled form field, etc.
Changing Data Types
Occasionally, it may be necessary to change the data type of a Form Field. For instance, one common mistake implementers make is setting the data type of a field like a Zip Code to "Number", because the field contains only digits. The natural assumption implementers make is that, since the field contains only digits, it must be a number field. This is generally incorrect, since the best practice is that if you aren't going to do math on a field value it isn't a number. Moreover, treating fields like Zip Codes as numbers will cause them to sort differently (in numerical order) than they would sort if they were text (alphabetical order).
Often, problems don't become apparent until a number of processes have already been started, so you not only wish to change the data type for future instances of the Form, you also want to change the data type for past instances as well. Happily, Process Director enables you to make the change retroactive by following the procedure below:
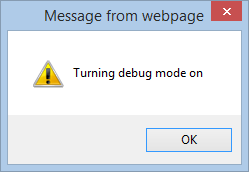
- Place the mouse pointer in the workspace tab area at the top of the page, and click the right mouse button. This will place the page in Debug mode, and a dialog box will appear notifying you that the mode has been changed. Click the OK button to close the dialog box.
- Open Form Definition and click the the Form Controls tab. In Debug mode, the Form Controls Tab will look slightly different.
- Click the Edit link to open the field properties dialog box for the field you'd like to change.
- Change the data type of the field to the desired data type and click the OK button to close the field properties dialog box.
- Click the Form definition's Update button to save the change to the Form Definition.
- In the Commands column of the Form Properties tab, click the Update Old Instances link. A confirmation dialog box will appear.
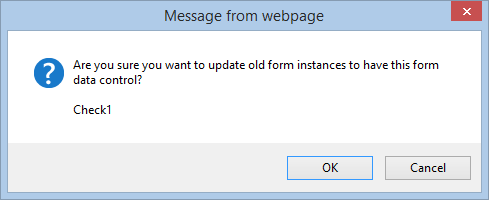
- Click the OK button to confirm the change, close the dialog box, and update all previous Form Instances to the new data type for the field.
 An additional debugging option exists to convert existing form data from a text field into a number or date field, as appropriate. This is available in the troubleshooting tab in the IT Admin while in "debug mode" and is called "Update All Form Data to match Controls". This will fix an issue that arises when trying to generate SQL Views that include text fields that stored integer or date data. Earlier version of Process Director stored this data as a string. This option will transfer the data from a string field in the database into the appropriate number or date fields. This doesn't affect the usual operation of Process Director, and is relevant only when trying to include these fields in a SQL View.
 For v5.32 and higher, an additional debugging option, which will appear next to form fields that are setting meta data attributes, will cause the system to update the category and attribute data on all old form instances using the form data on the instance.
Certain data types enable you to set a minimum or maximum value for the data the field will accept. This behavior will be different for text or numeric fields.
- For numeric fields, setting these properties will limit data entry to the values that fall within the numeric range specified in the Min/Max properties, e.g., a Max value of 10 will only allow a numeric value smaller than or equal to 10 to be entered.
- For text fields, the length of the text data will be limited to the values specified in the Min/Max properties, e.g., a Max value 10 will only allow users to enter a text string that is 10 characters long or less.
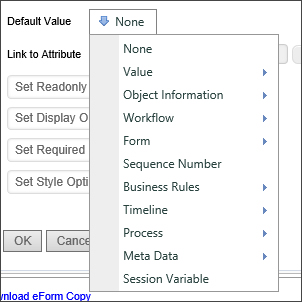
You can specify the default value of a form field. The Default Value dropdown allows you to select from a list of common default values, like Timeline Instance Names or the results of Business Rules. You can also specify the default be set to a custom value or result from a System Variable.
You can use this picker control to set a Meta Data Attribute from the Form Field.
For Case Management applications, setting the property will save the field as a Case Property, rather than a Form field. Case Management Forms often contain a mix of Form Fields and Case Property fields. Case property fields don't need to be replicated between forms. The Case Property is part of the shared data context that links all Forms to the Case instance. Once a case property is set, that property is available for any other Form in the case to get or set the property.
Some controls, such as radio buttons and dropdowns, can have both a value and a display string. Process Director will save both values in the case of those controls, and, by default, the case property returned will be the value of the control. The display string, however, can be returned via a Case system variable, using the syntax:
{CASE:PropertyName, format=string}
So, in any instance where you'll want to evaluate the display string, rather than a value, such as in a condition for a Business Rule, you'll need to evaluate the System Variable as a string, using the syntax above. If you select the case property from the dropdown menu in the Choose System Variable dialog, the case property will return the value, and not the display string.
This option gives you the ability to Enable or Disable a form control including the sections and collapsible sections. You may also Enable or Disable based on a condition using the Condition Builder.
This option gives you the ability to Show or Hide a form control including the sections and collapsible sections. You may also Show or Hide based on a condition using the Condition Builder.
This option gives you the ability to set the form control as required or not required including the sections and collapsible sections.
You may also set the form control as required or not required based on a condition using the Condition Builder.
 Validation and required fields work together in an important way, because Process Director will only validate a field if it contains a value. Process Director will not validate a blank field, even a field that you want specifically formatted using a Regular Expression. Setting a field as required tells Process Director that the field must contain a value, and will impose validation on a blank field. The fact that you specify a data type or regular expression for a field doesn't indicate to Process Director that the field must contain a value. So, if you want to ensure that Process Director validates a field, even if it's blank, then the field must be a required field.
Deleting Controls and Form Fields #
Deleting a Form field requires two different actions to remove them from the Form's design.
-
First, you must delete the Form control from the design surface of the Online Form Designer, then save your changes. The field data for deleted controls will, by default, remain as data in the Form instances that were created when the Form originally existed. This data is orphaned, because the original Form control is no longer present on the form.
-
The second step, therefore, is to navigate to the Form Controls tab of the Form definition to specify how to handle this orphaned Form field data. Controls that have been removed from the design surface of the Form are shown as being marked for deletion on the Form Controls tab.

You have two option links for handling this orphaned Form data: Delete or Remap.
If you click the Delete option, Process Director will first display a warning dialog box that requires you to click OK to confirm that you wish to delete the field, or Cancel to cancel the action. If you click the OK button, Process Director will completely erase the field and all of its stored data for all Form instances. This action cannot be undone, and the Form field data is completely and permanently erased.
If you need the data in the deleted field to remain accessible on the Form, you can choose to move the field data to a different Form field. To do so, first select the Form field into which you wish to move the data from the provided dropdown, then click the Remap link. The existing data from the old Form instances will be remapped to the field you selected for all existing instances. It's best to remap the data to a new Form field. If you remap the data to an existing field, any Form data in the existing field will be overwritten by the remapped data. Like deletion, remapping cannot be undone.
In the example shown in the screen shot above, the NewField has been selected for remapping the data from DeletedField2. Clicking the Remap link will complete the remapping operation, and the existing data will be transferred into NewField.
More Configuration Tabs
You can view the documentation for each of the other configuration tabs by using the Table of Contents displayed on the upper right corner of the page, or use one of the links below.
Properties: General Form definition properties.
Edit: Opens the editor for the form's visual template, the Online Form Designer.
Custom Task Event Mapping: Enables you to map Custom Tasks to run on specified form events.
Validation Rules: Enables you to add custom validation to the form.
Set Form Data: Enables you to set the value of Form fields automatically, based on events or conditions you specify.
Fill Dropdowns: Enables you to automatically set the options available in a dropdown control.
Other Tabs: Documentation for the Form Data SQL View, History, Meta Data, Versions, and Permissions tabs.
Documentation Feedback and Questions
If you notice some way that this document can be improved, we're happy to hear your suggestions. Similarly, if you can't find an answer you're looking for, ask it via feedback. Simply click on the button below to provide us with your feedback or ask a question. Please remember, though, that not every issue can be addressed through documentation. So, if you have a specific technical issue with Process Director, please open a support ticket.

