Related Topics
We can’t show you a working sample of this feature in the BP Logix [Samples] folder, since Meta Data categories can't be transferred between partitions. So, let's do an in-depth walk through of how and why to create Meta Data categories and attributes inside of Process Director.
First of all, you must have access to the Meta Data Admin area to create the categories of Meta Data that will apply to the objects inside Process Director.
Select your admin profile and look for the Meta Data Admin button. If you don’t see that button at the top of the screen, you may have to change your Admin profile in the IT Admin > Configuration section to add the button to your Workspace.

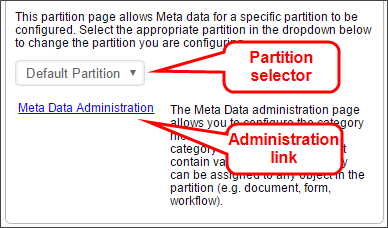
Meta Data is stored by partition, so you'll have to select the partition that holds the objects you want to describe using metadata, then click the Meta Data Administration link.
Meta Data Categories #
The first and most important step in classifying your content with Meta Data is to define your category schema (i.e. taxonomy). This schema defines a hierarchical tree structure of categories. Each category can have any number of attributes which allow custom information to be associated with the category when it is assigned to an object in the Process Director database. This tree is the foundation for categorizing (or “tagging”) objects and defines how information is organized, processed and distributed. The category tree, or any branch within the tree, should represent how you want data organized in your enterprise.
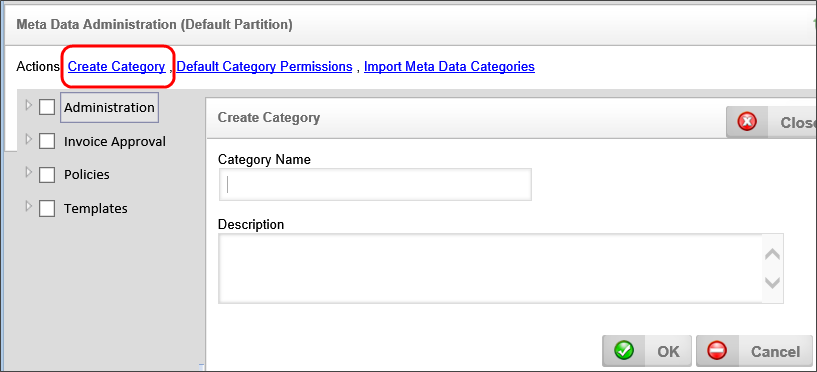
To create Meta Data categories in the Meta Data Admin area, click the link labeled Create Category to open the Create Category page.
Insert a name and a brief description of what this category contains. Then click the OK button.
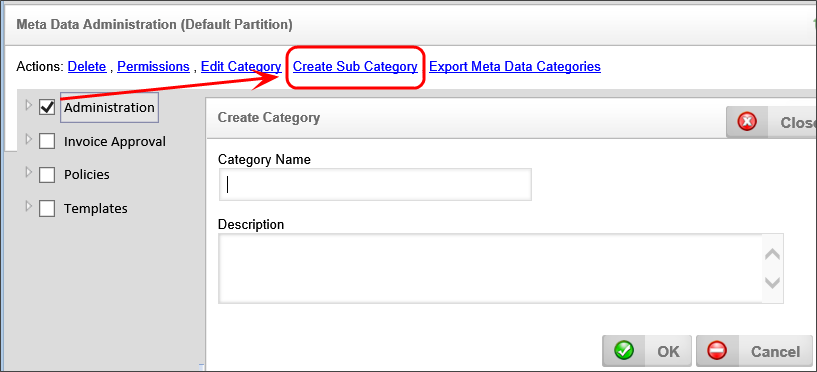
A category may have subcategories as well. To create a subcategory, click on the parent category to select it, then click the Create Sub Category link.
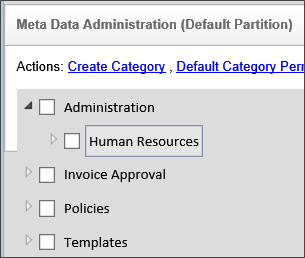
In this example, there is an Administration category and we will create a new subcategory called "Human Resources".
When you have finished creating your category, click the OK button to save it.
You should now see the new Human Resources subcategory under the Administration parent category.
When you are finished creating your Meta Data categories, you can leave the Meta Data Admin area.
Meta Data Attributes #
In addition to creating categories, you can also create Attributes for a category. Attributes are different than categories in that, instead of being a predefined value that is assigned to an object or instance, they are data fields into which you can store information from a form or process.
You should create attributes at the highest category level at which those attributes are shared. For example, let's assume that you have a Documents category with two subcategories, IT and HR. If both HR and IT documents will need to have a Keywords and an Effective Date attribute, then the best place to create the attributes would be in the Documents category, since all subcategories have the same attributes. That way, when we search for a document with an Effective Date after 1 Jan 23, searching for that single attribute at the Documents level will return both HR and IT documents. If we create an Effective Date attribute on the lower categories, they will be different metadata attributes, though they might share the same name. The Effective Date for an HR document will not be the same attribute as the IT attribute. So, we wouldn't be able to create a Knowledge View to search for a single attribute and return documents from both subcategories.
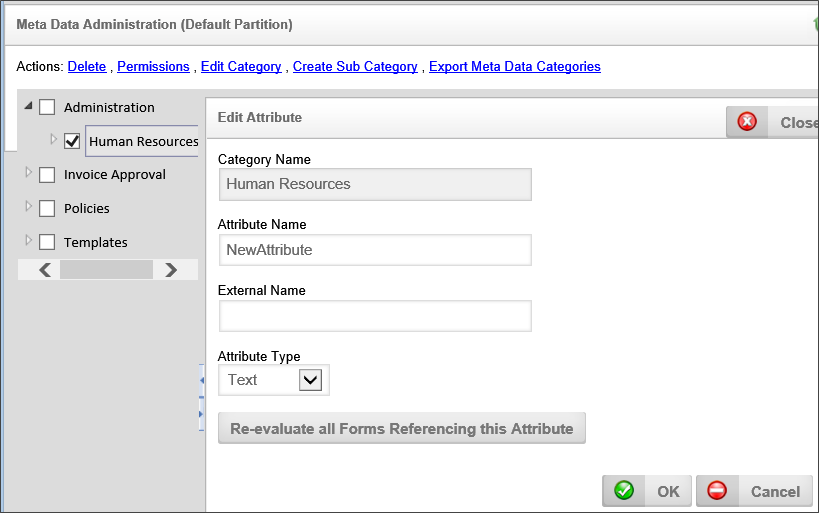
To create an attribute, click on the Category for which you'd like to create the attribute. Type the name of your new Meta Data attribute into the Attribute Name text box, select the type of data you’ll be storing from the Attribute Type dropdown, then click the Add New Attribute button.

Selecting the Edit this Item icon will enable you to change the Attribute's properties, while selecting the Remove this item icon will delete the Attribute.

The External Name can be used while importing XML information from other systems into Process Director.
The Re-evaluate all forms referencing this Attribute button should be used when you change attribute types. If you were previously storing numbers in a text format and then switched to numeric, any Business Rules or other form data about that attribute may be evaluated differently.
Once the desired attributes have been created, you can exit the Meta Data Admin area.
Documentation Examples #
The examples below use software simulation to walk through the process of creating a metadata schema with categories and attributes.
Documentation Feedback and Questions
If you notice some way that this document can be improved, we're happy to hear your suggestions. Similarly, if you can't find an answer you're looking for, ask it via feedback. Simply click on the button below to provide us with your feedback or ask a question. Please remember, though, that not every issue can be addressed through documentation. So, if you have a specific technical issue with Process Director, please open a support ticket.


