Related Topics
Process Director supports the ability to package unique business logic in the Custom Task that can be mapped to Form events (e.g. buttons). This allows custom logic to be developed once with the scripting interfaces and re-used across many Form definitions without any additional scripting. For information on creating Custom Tasks for Form see the Process Director Developer’s Guide for more information.
Form Custom Tasks are mapped to Form events. For example, Custom Tasks can cause the display of a Form, or Custom Tasks can be set to respond to a change in Form data. This will cause the Custom Task to be run in the context of the current Form. The Custom Task can view and modify any of the current form data.
Mapping Custom Tasks to Events
A Custom Task must be associated (mapped) to an event. The following events are available:
|
EVENT |
WHEN THE EVENT RUNS |
|---|---|
|
Form Creation |
When the form is first opened by Process Director and prepared for display. |
|
View State Init |
When the Form's View State is initialized. |
|
Before Conditions |
Before any form conditions are resolved. |
|
After Conditions |
After all of the form's conditions are resolved. |
|
Before Validation |
Before form validation rules are run. |
|
After Validation |
After all form validation rules have been run. |
|
Form Completed |
When the Form is marked as complete and closes. |
|
Form Display |
When the Form is displayed. |
|
Event |
Any form control set as an event control is changed. |
A complete list of events that fire during a form's life cycle can be found in the Events section of the Form Class documentation topic in the Developer's guide.
To associate a Custom Task with an event, click the Custom Task Event Mapping tab on the Form's definition. From there, click the Build button of the picker control, which is located to the left of the Add Custom Task button at the top of the tab, to open the Choose Custom Task dialog box.
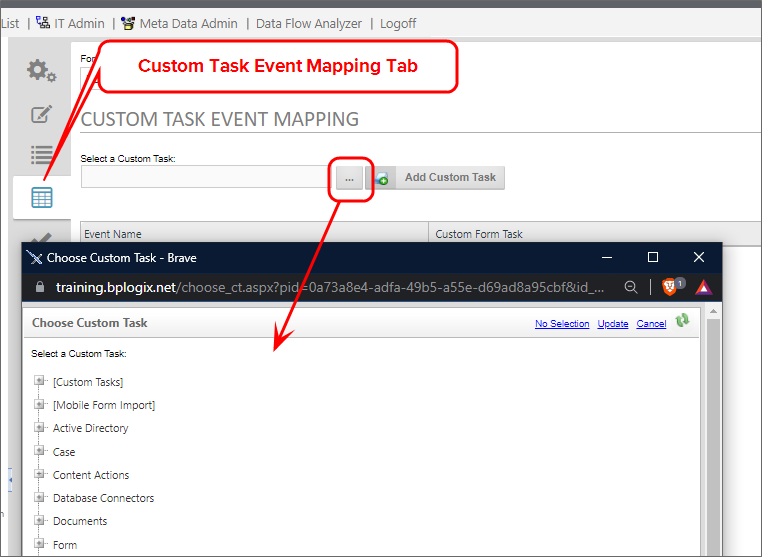
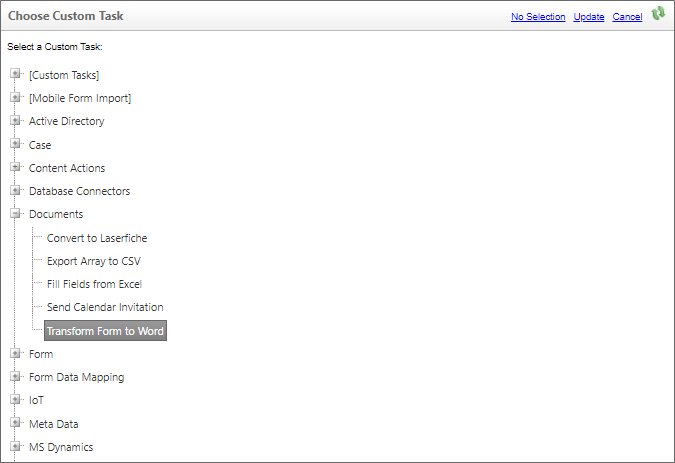
From the Choose Custom Task dialog box, navigate through the treeview to fine the Custom Task you desire, then click on the task to select it. The dialog box will close automatically.
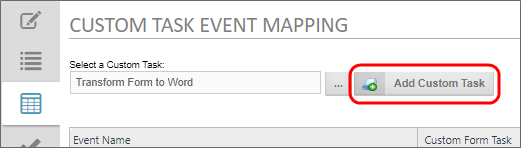
After the dialog box closes, the name of the Custom Task you selected will appear in the picker control. Click the Add Custom Task button to add the mapping to the form.
Once the mapping has been added to the list of Custom Tasks, select the event you desire to map from the Select Event dropdown in the mapped event line.
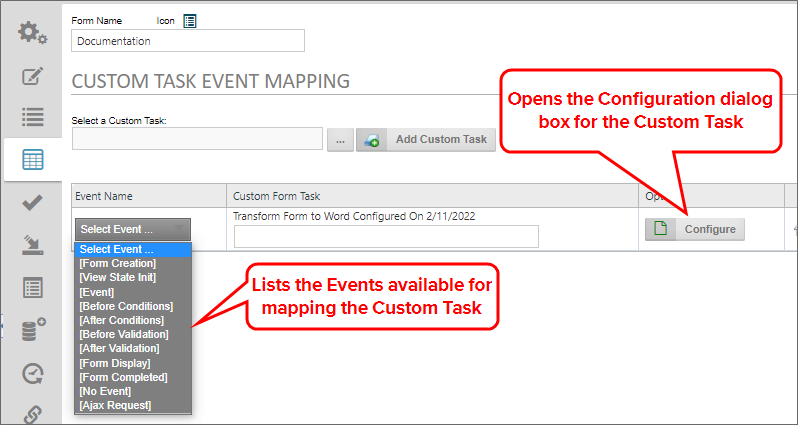
The dropdown will display all of the standard form events, as well as the control names of any control you've identified as an event field. If the control event you wish to map doesn't appear, then you must return to the Form Controls tab, and set that control as an event control. Once you've selected the event you wish to map, you may enter a brief description of what the Custom Task will do in the text box labeled with the selected Custom Tasks' name, which, in the example above is Transform Form to Word.... Now, click the Configure button to open the configuration dialog box for the Custom Task.
Each Custom Task has a specific dialog box, in this example we will show the configuration dialog box for the Transform Form to Word Custom Task. Specific configuration dialog boxes will be discussed below for each of the Custom Tasks.
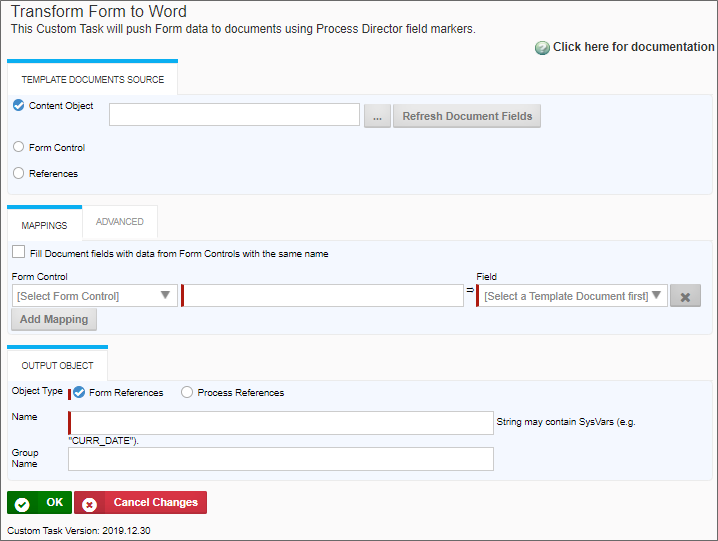
Make the appropriate configuration changes in the Custom Task's configuration dialog box, then click the OK button to close and save your configuration changes.
Finally, set any conditions that you'd like to impose on the Custom Task to control when it runs.
Form Transformations
Users often want to convert a Process Director Form directly into a printed form. To do this, they often try to design the Process Director Form so that it looks the same for both online and printed use. This very common and understandable practice is fundamentally wrong for a number of reasons, especially from a design viewpoint.
An electronic form is designed so that the only size limit is the resolution of the user's screen, and it has to be viewable by a fairly wide range of screen resolutions. A printed form, on the other hand, has strict size limits imposed by the space available on a standard sheet of paper, and the lansdscape orientation of a computer monitor is different from the portrait orientation of printed documents. The various design constraints for printed and electronic forms are simply too difficult to easily reconcile. This difficulty is complicated by the fact that many printed forms have a specific design that has been mandated by the organization, or by a government agency, and any printed forms must comply with this design.
With this in mind, you shouldn't try to design an electronic form to replicate a printed format. If you need a printed version of your form, you should design a print-specific Word or PDF template, then use one of the transformation Custom Tasks to convert the electronic version of the form into the printable template. There are two transformation Custom Tasks available to you: Transform Form to Word, and Transform Form to PDF.
Documentation Example #
Use the simulator below to create a Custom Task for a Process Timeline.
Documentation Feedback and Questions
If you notice some way that this document can be improved, we're happy to hear your suggestions. Similarly, if you can't find an answer you're looking for, ask it via feedback. Simply click on the button below to provide us with your feedback or ask a question. Please remember, though, that not every issue can be addressed through documentation. So, if you have a specific technical issue with Process Director, please open a support ticket.


